As we can see, you’ve sworn to clean every last speck of dust in your home. You’re just finished and the place looks spotless! But have you looked at your ceiling fan?
If you’ve ever been in this situation where a dirty grimy ceiling fan just ruined your clean home, you know the pain!
However, fret not! In this post, we’ll show you how to clean greasy ceiling fans at home, without a fuss. This includes 5 easy steps that cover everything from grabbing what you need to final finishing touches.
After you’re done, you’ll be able to sleep at peace knowing that your home is finally sparkling.
Enough of the idle talk, put on your cleaning gloves, and let’s get right to work, shall we?
How to Clean Greasy Ceiling Fans?
Greasy ceiling fans are mainly due to the dirt and dust which accumulate over a surface when not cleaned periodically. Now you may clean and mop your floors every other day.
But how often does the ceiling fan get attention? Moreover, oil and grease that emit from cooking, also settle on the ceiling fan sometimes.
If there’s no escape route for this gas, it ends up making your walls and ceiling fan quite grimy.
Keep that in mind while we see how we can remove this mess easily.
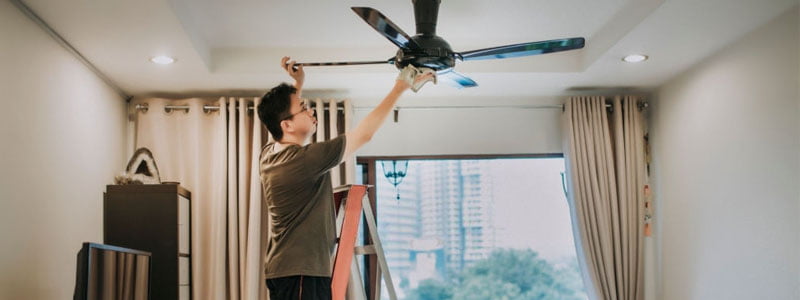
Step 0: Gather everything you’ll need
First things first, we’ll need to see if we have all the required items. It’s a good practice to do this beforehand.
That way, you won’t have to take a break and head to the store to buy a ladder at the last minute. So, let’s take a look at the list.
- Stepladder/ tool
- Plastic sheets
- Rags
- Cleaning solution
- Water
And that’s it! Most of these are household items that you probably have lying around. Now that we’ve gathered everything we’ll need, let’s dive in.
Step 1: Cover floor and furniture
Whenever you clean dirt from the ceiling, it’s always a good idea to do some prior prep beforehand.
That’s because dirt can easily fall and make your whole room a mess. In the worst case, it may also stain your favorite bedsheet.
To save yourself from all that headache, buy some big plastic sheets and cover everything where dirt may go. Don’t be stingy and simply cover the area directly beneath the fan.
Take some extra time and make sure to cover the corners where the ceiling dirt can easily settle but doesn’t want to get out.
Moreover, covering the floors is also pretty important when you’re removing spider webs from high ceilings. Hence, don’t contemplate and just line everything with plastic. After all, better safe than sorry!
Step 2: Dust off loose dirt
Now let’s say you have the toughest grease stains stuck on your ceiling. If you start cleaning with a wet cloth directly, things may go south.
This is because all the loose dirt will stick with the tough dirt and form a tough dirt layer that takes ages to clean.
Instead, take a dry rag and brush off the excess dust and dirt. This way, you can easily clean off the loose top layer. However, make sure that you have a protective mask on.
This will save you from a lot of sneezing and coughing, especially if you have allergies. Also, a cap will protect your hair from dirt and you won’t have to run to shampoo.
Now even if you’re using a cobweb duster to remove cobwebs, these precautionary steps are a must!
No products found.
After you’ve cleaned off all the loose dust, it’s time to face the tougher tides.
Step 3: Wipe with a wet cloth
Now that the top layer of dirt and dust has come off, it’s now time to target the hard dirt. Before we get into battle, take an old cloth or towel and soak it in some warm water.
After that, wring out the excess and use this to wipe the dirt that is stuck to the fan blade. Even if it doesn’t remove everything, you’ll see that the color of the blades will start to show.
Now the point here is not to clean off all the tough dirt. That’s not going to happen with plain warm water. However, we’re trying to clean off some of the dirt and make it less tough.
This way, it’ll be way easier for you to cut through the grease with an actual cleaner. Even if it seems like an extra step which takes up time, take the few extra minutes.
You’ll thank us later when you see how easily the grime comes off in the next step.
Step 4: Use a degreaser
No products found.
Now it’s time to use a cleaning agent or a degreaser. This will cut through the dirt and make your fan gleam with pride!
Even if everything’s going south, you’ll be able to lay in bed and be proud of yourself when you look up to the shining fan.
To clean the fan that well, you can head out and purchase a store-bought degreaser. Or, you can easily make one at home yourself. If you’re clueless on how to make one, here’s a quick recipe.
How to Make a DIY Degreaser?
To make a cleaning solution that will cut through the grease like a sharp sword, here’s what you’ll need
- White vinegar
- Water
- Dish liquid
- Baking soda
Take a spray bottle and mix vinegar, baking and water in the ratio 1:2. After you’ve done so, add a few drops of any dishwashing liquid and your homemade degreaser is ready.
Due to vinegar and baking soda, it’ll be able to cut through even the toughest grease. After a wipe, you’ll be left with gleaming fan blades.
To achieve this feat, spray some cleaner on a rag and give the fan blade a good wipe down. To speed things up, you can spray this liquid on the grease and leave it on for 5 minutes.
Then take a rag and soak it in the degreaser. Next, wipe away and you’ll be surprised at how easily the dirt is coming off.
No harsh scrubbing or rubbing is even required!
Step 5: Wash with water and dry
Now we’re inching close to the grand finale. After all the grease and dirt are removed, it’s time to give the fan blades a final cleanup.
Why, you ask? Well removing any residue from the cleaning agent will keep the fan cleaner for longer. Moreover, it will prevent any long-lasting damage to the fan blades.
Since the degreaser contained vinegar, prolonged exposure may cause the paint to fade or chip off.
Therefore, to be safe, clean with a wet towel and let the fan dry. Switch the fan on and it’ll dry in no time at all!
Conclusion
And that’s all from us folks. We hope that you enjoyed reading up on these tips and learned something new.
If you have any more questions on how to clean greasy ceiling fans, don’t forget to let us know in the comments below.
Until then, stay happy and alive!